")
If properly maintained, your portable ice maker should last many years and greatly benefit your home.
Check out the video below, which will walk you through the steps I’ll cover in this article.
An important step toward maintaining your portable ice maker is making sure that it’s cleaned regularly. If you’re not careful, mold or harmful bacteria can grow inside your ice maker and make you sick.
Can Bacteria Grow in Ice Makers?
All ice makers get surprisingly dirty over time. It’s because ice makers create the perfect location for bacteria and mold to grow. Bacteria and viruses can live in freezing temperatures, meaning they can be transferred to your ice. Yikes!
The perfect Gift from GiftCards.com / Learn More Here
The best way to keep bacteria and mold from a portable ice maker is to make sure that your portable ice maker stays clean.
Below you’ll notice mold growing in my countertop ice maker. It doesn’t take long for mold and grime to form, so we need to make sure that it’s cleaned on a regular basis.

Cleaning your ice maker at least once a month (more if you can) ensures that your ice is always fresh, tastes great, and that your portable ice maker works properly.
How Often Should A Portable Ice Maker Be Cleaned?
A portable ice maker should be cleaned every month. I wouldn’t let it go longer than three months. If you’ve stored your ice maker away for the winter, you should clean it immediately before using it. Also, if you notice the following warning signs, you should clean your ice maker immediately.
- Your ice smells funny.
- Your ice has a strange or unusual taste.
- You visually see dirt on the ice maker’s interior walls.
- The ice is smaller than usual or melts faster than it should
- The ice is cloudy in appearance (If you have an ice maker that produces clear ice)
- Your ice maker isn’t working correctly (Troubleshooting your ice maker)
My Top 3 Cleaners for Portable Ice Makers
Keeping your ice maker clean is vital to your well-being and the quality of ice you serve to your family or customers. A great way to guarantee that your portable ice maker produces the best ice possible is to use a quality cleaner.
There are three things that you should consider before you purchase a cleaner for your ice maker.
It’s recommended before using any cleaning solution that you read the instructions on the back of the bottle.
Related: The Best Homemade Cleaning Solution – Save Money!!
This will give you all the necessary steps for proper use. Below are my top three portable ice maker cleaners.
 $32.99Learn More
Keep your ice fresh and your machine running like new. This powerful, USA-made solution works with all major brands, from Nugget and Opal to Profile, Igloo, Sonic, and more. Our proprietary formula removes buildup without leaving behind funky tastes, ensuring your ice stays pure and clean.
We earn a commission if you make a purchase, at no additional cost to you.
07/13/2026 04:04 am GMT $22.95Learn More
Keep your ice crystal clear and fresh with our nickel-safe, citric acid formula made in the USA. One value-size bottle gives you 8 uses — more than a year of cleanings — and works with all ice makers: countertop, portable, built-in, and commercial. Safe for all major brands, it removes tough scale and buildup without damaging metal parts, so your machine lasts longer and your ice tastes better.
We earn a commission if you make a purchase, at no additional cost to you.
07/13/2026 04:04 am GMT $14.99Learn More
Remove limescale, mineral deposits, and odors with our nickel-safe, citric acid solution made for all ice makers — from countertop to commercial models. This complete kit includes a premium cleaning cloth for hard-to-reach spots, helping you maintain fresh-tasting ice and peak machine performance. Easy to use and effective, it keeps your ice maker running smoothly and lasting longer.
We earn a commission if you make a purchase, at no additional cost to you.
07/13/2026 05:03 am GMT
Use the links to get the best price online on all the cleaning solutions above.
I use the Essential Values Ice Machine Cleaner to clean my ice maker in this article.
Can You Use Vinegar to Clean a Portable Ice Maker?
Absolutely!
Vinegar is a great natural cleaning solution for your portable ice maker. It’s not only natural, but it also dissolves lime and hard water that will cause your ice maker to malfunction. Add two cups of white vinegar per cup of water to your ice maker or a spray bottle. Vinegar will kill 82% of mold species, including black mold, on porous and non-porous surfaces.
The problem with using vinegar for cleaning is that it’s slower than other cleaning solutions. If you are set on using a natural solution, vinegar will do the trick. If your ice maker is extremely dirty and needs more care, the solutions above will work well.
Steps to Cleaning a Countertop Ice Maker
To help you properly clean your portable ice maker, I recommend following these simple steps.
First, make sure your portable ice maker is unplugged.
Ensure all the water is drained from your unit by using the drain plug on the side, back, or bottom of the ice maker.
Add water to the ice maker and use a cleaning solution. I listed the best cleaning solution for portable ice makers in this article.
Make sure that the storage basket is removed from the ice maker.
Wash down the inside walls of your portable ice maker using a rag.
Run your ice cycle several times. This will ensure that the cleaning solution runs through the entire unit. Just throw away the ice after each basket is full.
Drain out the water from your unit.
Next, add fresh water and run the ice cycle. Throw away the ice once again.
Continue to rinse your ice maker over and over again. Use a spray bottle to spray the hard-to-reach areas. Make sure that your unit is rinsed before you start eating the ice.
It doesn’t matter what portable ice maker brand you own; whether you’re cleaning an Igloo, Emerson, Magic Chef, Frigidaire, or a hOmelabs portable ice maker, the steps I provide will be the same.
Let’s get started.
Unplug Your Portable Ice Maker
When cleaning your portable ice maker, ensure it’s turned off and unplugged.

Unplugging your unit will protect it from getting damaged, and you’ll want to move it close to a sink so that you can begin draining the water in the reservoir.
Drain the water from the reservoir using the drain plug on the side or under the ice maker.
Before cleaning your portable ice maker, you’ll need to drain the remaining water.

On the bottom or the side, you’ll notice a small plug.
My portable ice maker has a small screw cap with a little plastic plug inside the drain hole.
Bring your portable ice maker to where the water can drain into the sink, a bowl, or a bucket. Remove the drain plug and let all the water flow from the reservoir.
Draining all the water from your unit may take a few minutes.
Use a cleaning solution to wash your portable ice maker
Put the drain plug back into the portable ice maker.

Add water with a cleaning solution.
I use the Essential Values Ice Machine Cleaner in this tutorial. The label says to use 1/4 of the bottle (40oz or about 120 mL) in 1 gallon of water.

Use a one-gallon container and add 1/4 (40oz or about 120 mL) of the solution to the jug. Mix it all together and then add the water and solution to the water reservoir (you will probably have to remove the ice basket to fill it up with water and then put it back inside the unit).
Add water and solution to a spray bottle for those hard-to-reach areas for a bonus tip.

Now, plug your portable ice maker back in.

Turn your ice maker back on, and begin the ice cycle.

This is going to take several minutes. As your ice maker produces ice, throw the ice away in the sink.
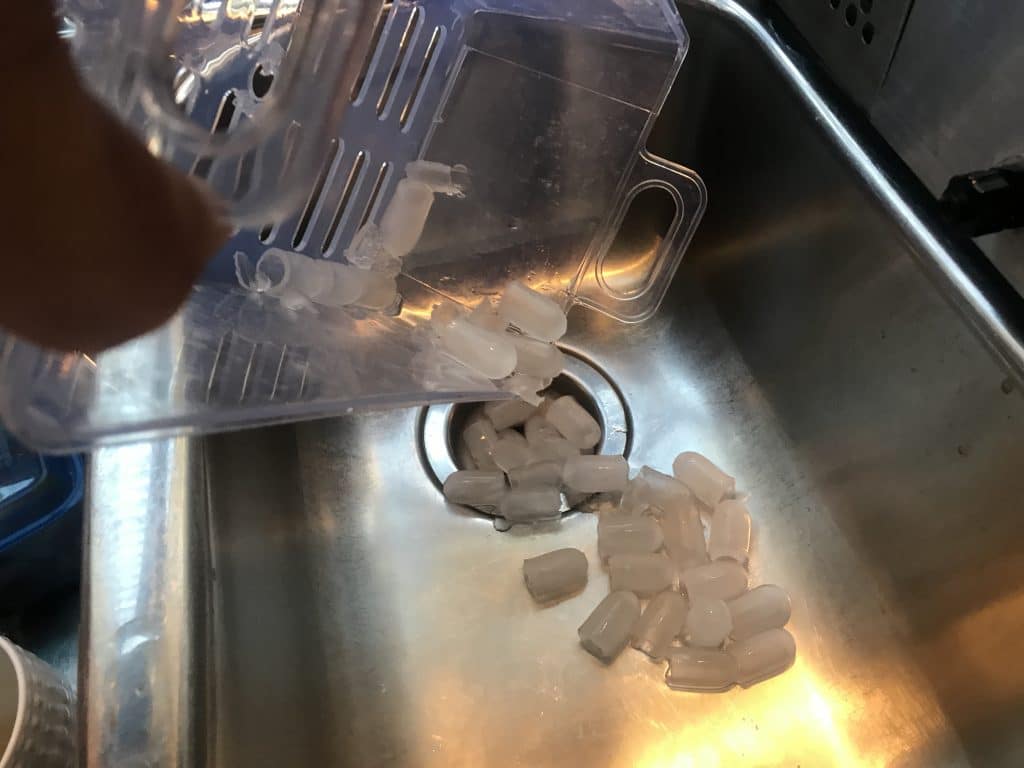
Allow the ice maker to cycle through the ice-making process several times – the more times it cycles, the cleaner it will make your unit.
Ensure you have water and solution left in the reservoir to scrub the ice maker later. I ran the ice cycle until the water reservoir was half empty (or half full, depending on your perspective). The ice cycle ran for about 40 minutes.
Remove the storage basket and place it on the side.
Remove the ice basket from inside the ice maker. You can place it to the side until you clean the unit.

When the ice basket is removed from the ice maker, it’s a good time to rinse it off with soap and warm water. You’ll notice that it’s pretty dirty and needs to be washed.

Add warm water to your sink and let it soak for a while. Remember that your ice basket is in contact with your ice all day. Your ice goes from the storage basket to your mouth – make sure the ice basket is clean.
You can let your storage basket soak while cleaning the rest of the unit.
When the storage bin is soaking, clean it well, rinse, and dry it off.
Scrub down the portable ice maker
Next, turn off the ice maker and unplug it. I know, again!
The storage bin should be removed, and the cleaning solution cycled through the entire unit; it’s time to do a more thorough cleaning.
With some cleaning solution left in the water reservoir, use a cloth and wipe down the entire ice maker.

The key to a complete clean is to reach the places that cannot be reached with a cloth. We can do this using two separate methods.
First, I used a spray bottle to spray deep inside the ice maker.

I use a small brush to get into those hard-to-reach areas. You can pick up the spray bottle on Amazon here, and the brush that I use on Amazon here.

After completing these steps, your ice maker should be perfectly clean. You should even smell the difference.
Drain the water
For this step, drain the water out of the ice machine again. As instructed above, remove the drain plug, and drain the water into the sink or bucket.

This may take a few minutes, depending on how much water is left in your reservoir.
Rinse your portable ice maker
With the drain plug removed from the ice maker, pour fresh water into the reservoir and let it drain directly into a bucket or sink.
We have a removable tap in the kitchen, and I can rinse the ice maker with the tap.

You can use a spray bottle with fresh water and spray the areas you cannot reach.

Repeat this step several times. Make sure you rinse and then rinse again!
Do not skip this step; your ice will taste like the cleaning solution used to clean the unit. Rinse your portable ice maker thoroughly after washing it.

Next, dry inside the ice maker using a dry rag. You’ll notice small pieces of debris that make their way to the bottom of the water reservoir.

Wipe away all those pieces from the bottom of the ice maker and do your best to dry the inside walls of the ice maker.
Now you can put the drain plug back in.
Make ice again and throw it all away
Almost done. To ensure that all of the cleaning solution is gone, make more ice and toss it into the sink.
So, you’ll want to plug the ice maker in once again.

Now it’s time to run the ice cycle.

Please don’t use this ice; dump it all into your sink. After several ice cycles, you can taste the ice to ensure no taste of soap or a cleaning solution.
If the ice tastes great, then you’re done.
Drain the water from the ice maker again using the drain plug. After the water is drained, you can place the drain plug back and fill the reservoir with fresh water.
Don’t forget to wash the outside of the ice maker. Normally, dirt on the exterior will eventually make its way into the interior. Plus, a shiny ice maker looks great in your kitchen.
You may need a stainless steel cleaner if the portable ice maker is stainless steel. I like using stainless steel wipes because they are much faster and easier to use. I picked some up on Amazon here.

Success! Your ice maker is clean.
Simple Steps For Maintaining Your Portable Ice Maker
A regular maintenance schedule will help preserve your portable ice maker’s life and ensure you’re making the highest quality ice possible.
Here are some simple steps to maintaining your portable ice maker.
It’s good practice to unplug your ice maker if you’re away for a long time.
I would suggest emptying all the ice and water, wiping down the walls of your ice maker with a cloth, and letting it air dry before you leave on vacation or storing it away for the winter.
Storing a wet ice maker will cause mold to grow.
If you’ll be away for more than a few days, what’s the point of your ice maker going through the ice cycle? It’s better to turn it off, empty the water, dry it off, and store it away.
Always keep your portable ice maker clean.
Another good tip for regular portable ice maker maintenance is keeping your ice maker clean. As mentioned above, cleaning your ice maker isn’t hard, but it does take time.
Make sure you take the time to wipe it down with a damp rag and let it air dry. Keeping your ice maker clean helps your ice maker to work correctly and that your ice tastes great.
Ice makers can become surprisingly dirty over time, and wiping it down each week with a damp rag helps them run as designed. You don’t always have the time to clean your ice maker as thoroughly as we mentioned above, but wiping it down and rinsing it out should be done every week.
To ensure that your ice always tastes its best, I recommend changing the water in your reservoir daily.
Wash your ice storage basket
Take the time to wash your ice tray daily to ensure it’s free from bacteria. Your ice is sitting in that basket all the time, so you want to ensure you have washed it with some soap and warm water. Seriously, it takes 5 minutes.
Add some warm water to your sink and place the tray inside the sink with the water. You want to be careful not to use harsh chemicals when cleaning any part of your ice maker because the taste of those chemicals will be transferred to the ice.
Don’t use any cleaning solution that would harm the ice maker
You want to make sure that you don’t use anything to clean your ice maker that will cause long-term damage.
It’s always good to use “ice maker-friendly” cleaners, and never use boiling water which will end up melting the plastic, which is the main construction of your ice maker.
A mild detergent and a damp rag are the best practice for cleaning your ice maker. Use the cleaning solutions that we suggest above.
Descale your portable ice maker regularly.
Lastly, a big problem with an ice maker is hard water. Often an ice maker needs to be cleaned from calcium build-up inside the unit. Calcium build-up can mess with the sensors and cause your ice maker to malfunction.

There are two ways to tackle this problem. I would suggest that you purchase a descaler from Amazon. Check out my TOP PICK for a portable ice maker cleaner above; it’s both a cleaner and a descaler.
The second way is to use a teaspoon of vinegar with warm water. This natural solution will dissolve the calcium, and return your ice maker to good working order.
Conclusion
This article gives you a few ways to keep your portable ice maker clean and working correctly.
Maintaining your unit is not difficult, but it does take some time.
You want to consistently clean your portable ice maker because this can add years to your machine and improve your ice’s flavor.
I would say that it’s necessary to clean your unit every second week for heavy use and a minimum of every month for regular use. You will see signs when your portable ice maker should be cleaned (we listed those signs above).
This reminds me that I need to clean my portable ice maker.
If you have any other tips for keeping portable ice makers clean, let us know in the comments below.
Luxe Brands Extra 30% Off with Code: STYLE30. Plus, Free Shipping Shop Now


9 Comments
what can u do if a ice maker works motor and arm wks but dont make ice has water i cleaned it is filling up with water just give me ice
It would have to be the compressor. I would purchase a new one.
do you leave your icemaker open when you are done using it? I’ve had a problem with mold before and I wondered if that would help or make it worse because of the dust that would settle in.
Debbie
No. When I am not using the ice maker, the cover is always closed. I always dry it out when storing it as well.
Hey All-
I hope you can help me with my issue. I have a snowworld Ice maker with auto clean. I use only filtered in my ice maker. I run the auto clean function about every 3-4 weeks with vinegar solution. I have had it for about 8 months. I have now noticed that there is a red mold/bacteria that is growing on the ice lift paddle and especially in the bowl that holds that water with the metal rods that makes the ice. I can’t get it to clean out. During the clean mode there is not time to get in with toothbrush to clean that bowl where the metal poles out. What do I do to get that red mold out. Is there something that will prevent it from reoccuring. Thanks to anyone that can help.
Hey, I am not familiar with this brand of ice maker. I think maybe it’s rust from somewhere in the ice maker. I have heard of people complaining about certain ice makers that rust will form inside the unit and then stain portions of the ice maker. I am not sure if this is your case with you, but if it is rust, you probably want to purchase a new ice maker.
why is my ice maker leaking.
It could be a number of things.
A cracked tank, a leaky hose.
I did not use my IKich countertop ice maker in a few months so I wanted to clean it. Normally I have used vinegar but I read your review about using Essential Values. It works great as per your instructions…..I especially like your idea of using a spray bottle to hit the hard to reach places….and this formula really has no odor, unlike vinegar, which can linger for a while. Good job!